Showing posts with label Annie Sloan. Show all posts

8.04.2015

DIY | Dining Table Makeover

Before we moved to North Carolina, I printed out the floor plan of our new place and began sketching in where all of our furniture would go. Knowing that we would have a legitimate dining room for the first time, I was set on I getting a new dining room table to fit the space better than our breakfast table could. There was only one small problem... a new dining room table was just not in the budget. I mentioned in this post that I found this $20 library table on an online trading site. T-W-E-N-T-Y dollars, folks!
I had researched exactly what I wanted to do with the table before starting the project. My plan was to strip/sand down the table top to its bare wood, and then choose a stain and sealer, no paint. Then, I wanted to paint/wax the sides and legs of the table to look distressed. I have posted about some of my previous DIY furniture pieces before here and here, and in both projects, I used Annie Sloan chalk paint and waxes.

One morning, before Matt left for work, I asked him to get out the electric sander for me, because I was going to start on the table. Once he left, I got to work. I sanded the entire top of the table, and the color was definitely not what I was expecting. I loved it! It was then that I decided I did not want to stain the top anymore, and instead, I would just seal it.
Here are all of the products I ended up using for my table. On the left, the water-based, clear protective finish (sealer). I didn't want anything glossy, so this "Clear Satin" was perfect. On the right, you see I actually chose not to do an Annie Sloan brand of paint, but instead, I used a similar chalk paint that matched the color I was going for a little better. It was also cheaper. And, of course, I already had my trusty soft and dark waxes from Annie Sloan. (<-- game changers)


I coated the table top three (or four) times with the sealer, and in between each coat, it needed time to dry. So, the first thing I did after sanding the top was brush my first coat of sealer on the top. While that was drying, I painted the legs and sides of the table with the Vintage White paint. Notice, I did not strip or sand these parts of the table. This is by far my favorite part about using this chalk paint--not an insane amount of work.

After allowing both the sealer and the paint to dry, I went in for another coat of each. The paint dries very fast, so pretty soon after that, I was able to start waxing the sides and edges with the soft wax, followed by the dark, followed by a rag to brush strokes in the direction of the grain. This is what creates that distressed look that is so popular right now.
After allowing that to dry, and after another coat or two of the protective finish over the entire table, there was a finished product, and I couldn't be happier. It is exactly what I had envisioned before beginning the project, and even better, I did it myself.
If you think it looks good in our old space, just wait until I give you a peek into our new home with a picture-tour of our dining room.. coming soon!

5.13.2014

DIY | Mirror & Patio Furniture Makeover

Annie Sloan is my girl. She does it again. At least, her chalk paint does. This past weekend, Matt and I made a quick trip to the bay house to see my mom for her birthday/Mother's Day. We were there less than 24 hours, but we packed in a whole lot of fun--crawfish boil, beach trip, and some family time--my kind of weekend. While we were there, my mom gave me an old mirror than she had planned on selling in a garage sale or just throwing away, but I saw potential. Matt doubted, but I was obsessed, and pleaded with him to let me bring it home. He obliged, and we hauled the extremely heavy 3' x 4'  wood-framed mirror. He's the best.

If you missed my first Annie Sloan post, here is a furniture makeover that teaches you how to use the paint. The best part--no stripping anything. You just start painting. This mirror was no different. The only preparation I needed to to for the mirror was use painter's tape to line the edges of the mirror.
After that very little preparation, it it time to paint. If you missed the first Annie Sloan post, here is what I was using...
First, paint the color on. No stripping, no sanding, no nothing!
After the paint is on and dry, it's time for the wax. Clear wax goes on first. It is painted on just like the paint color. Once the clear wax is on, dab the dark wax onto small sections at a time, and then take an old rag and wipe away what you just dabbed, leaving behind some residue from the dark wax--making the distressed look you are going for. 

After it was dry and time to hang, we realized how heavy this mirror was and that we needed some special hardware to hang it on the wall. A quick run to Home Depot, and we were back at it. Matt helped me hang it, and he even showed me a new trick. When you are having to dig into your wall, hold a wet paper towel underneath where you are digging, so that none of the dry wall powder gets on your furniture, floor, etc. 

Once the hardware was safely and securely in the wall, it was time to hang the mirror!

Below is the finished project. It was the perfect addition to our little guest room/office.
Another project we tackled this weekend was re-painting our patio furniture. It needed a little makeover. We bought some black [outdoor] spray paint and went to town. Here is a before and after.

I will leave you with one last picture. I am always on morning potty duty for Avery. Matt does night time. Here was our morning this beautiful wet Tuesday morning. 
Happy Tuesday, y'all.

2.01.2014

Furniture Makeover

We lived in a small, one-bedroom apartment for the first year and a half of marriage, and we are now in a bigger place, with more places for furniture. We had been saving furniture that had been given to us, but it was sitting in our storage unit because there was just not space, and to honest, a couple pieces just did not go with our decor.

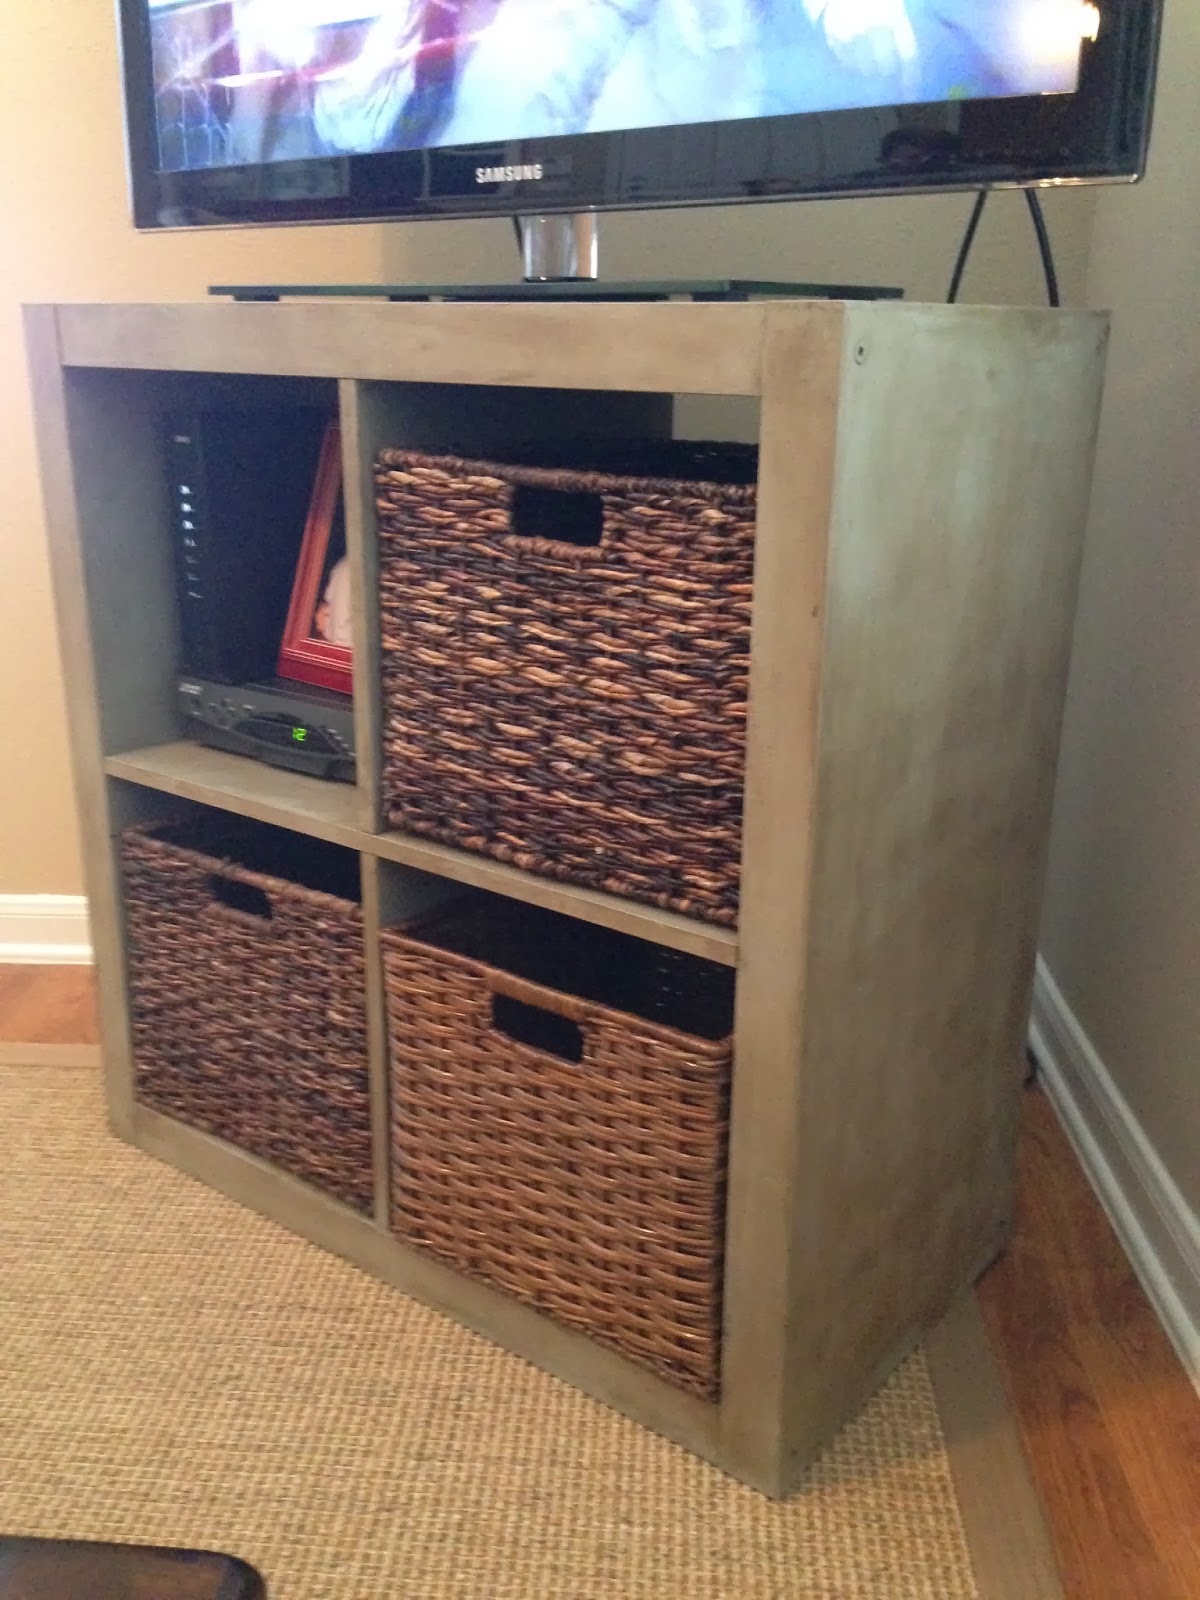
One of them was a small, bookshelf-type piece from Ikea that looked black, but Matt swore was "espresso," which still wasn't much better. We hid this piece in our room, and had bought baskets to go inside to try to make it look more like our style. When we knew we were moving, we knew we needed a media center, but everything we liked was so expensive. We have continued to be cautious whenever buying new furniture, because we know that everything we buy, we want to be able to use for a long time in our future homes. Matt had the idea to use the Ikea bookshelf as our media center, and I was less than enthusiastic about the idea, but I obliged because I knew we were trying to save money. I did end up talking him into letting me try to paint it, and he even wanted to help. Here is the bookshelf turned media center piece before the makeover (and during Christmas-time):


The other piece that we decided to makeover at the same time was a beautiful table that was given to us by family. It really was beautiful; it had been refurbished before, however, it was just not our style. It didn't have a place in our home as-is, so it stayed hidden away in our storage unit for over a year. Here it is before the makeover:


My mom has re-done about five pieces of furniture from the bay house she and my dad bought two years ago that was furnished with furniture that "was not their style," so they made it their style. She was the one who told me about Annie Sloan Chalk Paint. Matt and I did some research about the different colors and ways to paint with this type of paint. We decided on the color "French Linen," and went to buy all the goods. Here is everything we used/you need:


Pictured above is the chalk paint that we chose, French Linen, the soft clear wax, and the soft dark wax. In order to get the antiqued look we wanted, you will need all three cans. Then, you'll need paintbrushes and small towels/rags (for the dark wax).

The BEST thing about this painting technique is that you do NOT have to strip the finish! No sanding, no stripping, nothing- it's awesome! The first step is to paint the entire piece of furniture using a paint brush with the color of chalk paint that you choose. Depending on how much texture you want on your piece, you can be either lax or more precise with your brush strokes. My motto is "the more imperfect, the better," so we painted more careless on purpose with more imperfect strokes. After painting, here is what the furniture looks like… almost good enough to leave it just painted!


But then the magic happens! It does not take long for the paint to dry, but once it does, it is time for wax. The best thing to do is work on small sections at a time. We used a paintbrush to brush the clear wax onto a small section. After that, we took a round brush to dab on the dark wax over the section where the clear wax was brushed on. You cannot mess this up. It looks really freaky that you are adding such a dark color, but once it is on there, you take a rag and just wipe it off! It leaves the section darkened a little and distressed/"antiqued" looking. Here is what it looks like after the waxes have literally been "waxed on and waxed off."


You are probably wondering why we did all of this inside… well, it was too cold to be outside. AKA- we were being divas. Sorry, not sorry. We had no spills, no worries! Once everything was dry, we were in love with how they turned out! Below are pictures of the finished products.


The small table ended up in our bathroom and is home to bathroom essentials. We have a long and narrow bathroom, so the shape of the table is perfect. I was very excited that the media center now fit our decor. It brings our living room together perfectly.